Sunday, April 24, 2011

It’s For the Kids, Right?

As many of you know, I specialize in design and 3D rendering.  I went to Roger Williams University to study architecture.  For as long as I can remember, I have loved to design and draw whatever popped into my head.  One of my earliest and fondest memories revolves around Legos as a way for me to express my designs and ideas.  I love Legos – I always have fun putting together models.  As a kid, I would get a set of Legos, build the model, play with it, take it apart, and combine it with previous sets to make some sort of “super thing”, whatever that thing was.  Sometimes it was a tank, other times it would be a fortress, aircraft, whatever.  For me, Lego building was a great escape. 

Ahhh - memories.
Even as an adult, I still have a deep appreciation for Legos, and if they weren’t so expensive, I would probably still be buying them.  So, when I started visiting the Choates with Allie, I was happy to see that all of their kids also loved to play with Legos, and I jumped right in helping them build various creations.  Then I found out David, my brother in law, also loved Legos.

Things just got serious, people.

Every evening, after the kids went to bed, David and I would dump out all of the Legos that the kids owned and we would just start building.  I had found a kindred spirit.  For some reason, we were always on the same page, and we could just sit there for hours building away.  Here are some of the creations that we collectively worked on.

“Huey” Helicopter and Fast Attack Jet

This was the first major building job that took a few nights to complete (we would actually put the unfinished model out the kid’s reach so we could continue the next night).  We started with the “Huey”.  We looked up the Huey on the Internet and did the best we could with what we had to emulate Bell’s UH-1 Iroquois helicopter, an iconic piece of flying machinery that has served in every major conflict since Viet-Nam.  We were able to build the body and get it pretty close to the correct proportions, but we had some issues – the original rotor was all wrong and our skids were just terrible.  So, it was off to Wal-Mart to find some parts – yeah, it got that involved.  We found a small chopper model for $10.00 that contained all the parts we needed – a spinning rotor with finished blades and a small landing skid that we used as a guide to building a larger version.  The end result was pretty decent (despite the multiple colors, but that is the price you pay for combining sets).
 
Jet on the left, Huey on the right.
Overhead view.
Tail, rotor and engine detail.

Rescue chain.
Engines.
Landing skids.
Because David and Sami have twin boys, there has to be two toys to play with.  So, we built a fast attack jet with working landing gear.  After all, the Huey has to be able to battle something, right?  Our jet is complete with a top mounted turret gun and after burner with flames.  The boys loved them, and played with them constantly until the day of the massive crash, to which one of the boys responded with a heavy heart, “oh no, there are so many pieces….”  I was not present at the time of the downing of the Huey, but I heard it was a heartbreaking event.

Apocalypse Vehicle

Well, David and I couldn’t have sad children on our hands, so we mothballed the Huey and the jet and got to work on the next masterpiece.  This build was going to have to be awesome, we were going to have to outdo ourselves and blow away all previous models.  Our solution: the ultimate apocalypse vehicle.  We went all in with this one – we even decided to use pink pieces from David’s daughter’s Lego sets.  We started with a monster base vehicle – massive oversized tires, multiple compartments, each with flip up roof access, a massive plow attachment on the front, and bays for three secondary vehicles.  The AV also boasted multiple gunner stations, look out posts, communications tower and armory. Not only does the AV contain all of the above mentioned awesomeness, but it was built like a tank.   After hearing about the Huey crash, David and I resolved that this vehicle was going to have to be “boy proof”, meaning that is going to have to stand up to some punishing playtime.  We used heavy duty double wide blocks for the walls, and triple secured all flat pieces to make sure that this tank truly was that, a tank. 
The AV.


The AV crawling over rubble.
 
Now, as I mentioned before, there are two boys, so there has to be more then the one vehicle (beside, a tank this awesome would cause a war between the boys as to who got to play with it first).  Enter in the secondary vehicles:  a road warrior style ATV, a glider that launched off the back, and speed boat for water combat. 
The secondary vehicles - the boat in the foreground, the glider in the back.
Launch ramp up. Note the glider in position at the upper left hand side.
Ramp down, showing the ATV in its bay.
ATV launched.
I was not there when the boys discovered the completed vehicle, but I have heard that it was akin to finding the Holy Grail. The AV held up for the remainder of our visit, although I do not know the current status of our masterpiece. I am looking forward to the next visit so David and I can build the next great thing (hopefully, more Legos will have been purchased so we will have more parts to work with).

Here are a few images of a past creation – nothing as grand and epic as what we had created in our most recent visit, but certainly worth a mention, as it was the first time David and I collaborated on a couple of models.


Of course, when I got home, I built a quick little model for myself that I purchased in Medford – nothing terribly fancy, but it is a great reminder of the fun I had. 

Lego building has become quite the event for David and I, and whenever we feel a bit silly about it, we just remind ourselves, it’s for the kids, right?

Friday, April 22, 2011

Portland, Oregon

Let me just start by saying, what a cool little city!  Really – a very cool little city.  Allie and I decided that we were going to do the “no chain challenge”, meaning that we were going to immerse ourselves in the local shops and eateries, no McDonalds or IHOPs – just unique-to-Portland places.  Given that Portland really is a unique city, it was not hard to do.  We stayed at the Hotel 50 by the Willamette River – a nice little 3.5 star place.
Hotel 50
Our first day started late, as we had to drive up from Medford which took about 4 hours.  After getting checked in, Allie and I were on the hunt for food.  With Portland being a fairly small city, it was pretty easy for us to just leave the truck in the garage of the hotel for the duration of our stay and walk to our destination, wherever that may be.  We decided to pop into a nice little Italian joint called Pazzo Ristorante – a lovely restaurant located next to Hotel Vintage Plaza. 


Pazzo Ristorante is located on ground floor to the right of the photo.
Afterward, we walked around a bit and headed back to our hotel, all the while looking at the beautiful buildings and parks peppered throughout our route.  
Just one of the many older buildings that make up Portland.
The Nines - A beautifully ornate building.
The next day, we started with breakfast at the Rivers Edge CafĂ© for a fantastic morning meal.  From there, it was off to see the sights of Portland, starting with Portlandia.
Portlandia.
 

A plaque tells the story of Portlandia, but the rain makes it hard to read. Sorry!
This is a pretty cool sight to see, as it is something you would not expect to see in the middle of a block of office buildings.  Portlandia is the second largest copper statue (with the Statue of Liberty being the first).  The statue is based on the design of the city seal. It depicts a woman dressed in classical clothes, holding a trident in the left hand and reaching down with the right hand to greet visitors to the building. The statue itself is 34 feet, 10 inches high, however, if she were standing, the woman would be about 50 feet tall.
Next, we were off to The Lovejoy Columns.  However, before I get to those, we passed an awesome little park that focused on a unique modern style fountain in the center.  In the entire plaza sloped in toward the fountain, which at its center, had a large granite ball dedicated to the teachers of Portland. Part of the park had a small coffee shop with outdoor seating that was covered by an amazing yet simple glass canopy. Speaking of glass canopies, we noticed that there were many throughout the city, and here is my theory:  it rains constantly in Portland, so outdoor coverings are necessary.  However, if all of the canopies were made of more conventional materials, like canvas or concrete, then Portland would be shrouded in shade on their rare sunny days.  The glass allows light through will protecting the people from the wet weather – a great large scale architectural response to Portland’s unique climatic conditions.

An example of a clean, modern style of design.
Massive glass canopies provide protection during Portland's never ending rain.
However, there were not enough glass coverings to protect Allie and I as we made our way to the Lovejoy Columns.  As we got close it began to pour, so we had to take refuge in a small shoe shop next to the columns.  I tried to get some nice shots, but the weather made it rather difficult. 
The Lovejoy Columns - the rain made it difficult to capture any really decent images.
A closeup of the remaining artwork.
A little history: The Lovejoy ramp was constructed in 1926 & 1927 to carry Lovejoy Street over the Spokane, Portland & Seattle Railway's Hoyt Street freight yard. Noted bridge engineer Gustav Lindenthal, who was involved in the design of a number of Portland bridges, designed part of the Lovejoy ramp.

Some of the concrete columns of the Lovejoy ramp were decorated with detailed artwork. Though technically graffiti, it was done with much more care then most taggers. The art was the work of Greek immigrant Tom E. Stefopoulos, who worked as a watchman for the SP&S railroad from 1948 to 1952, and painted on the columns during dull moments.
The columns in their original state.
Next stop on the list: the Central Library.  This was a stop for my wife, as I am not a big fan of libraries (after all, I am from NY, and after seeing the NYC Public Library, all other’s seem sort of “eh”).  However, I was in for a surprise as this was not the usual municipal style building that most libraries are, and why would it be, we were in Portland!  This was a beautiful building, the front had a very church like entrance; grand and with purpose.  Once inside, the users are greeted with a small foyer that opened into an amazing central staircase that ascended 4 floors under a tremendous decorative frosted skylight.  The first run of the staircase consisted of black granite treads with amazingly ornate carvings on each riser.
The front of the Central Library.
Just one of the many phrased etched into the stairs - this one is Allie's favorite.
Each room of the library had such a grand, monolithic feel; you felt like you were in a library, a place of knowledge and learning.  Each floor was just as beautiful as the one before it.  After the first rise of stairs, the staircase split off into mirroring stairs made of white marble.
View up the stairs to the fourth floor lobby.
The view down.
Once at the top of the stairs, you had an unobstructed view of the frosted skylight, and you could see the final floor, which had a balcony looking back over the stairs.  The ceiling of the fourth floor lobby had a grand glass dome supported by 4 columns, truly a breathtaking sight.

Frosted skylight at the top of the stairs.
The dome in a ring of light
Dome glass.
We also took some time to visit the International Rose Test Garden to view the various roses.  However, all of the roses had just been pruned when we got there, but it wasn’t a total loss.  We were there on a rare sunny and clear day, so the view from the vista point was fantastic!
The view from the Rose Garden.
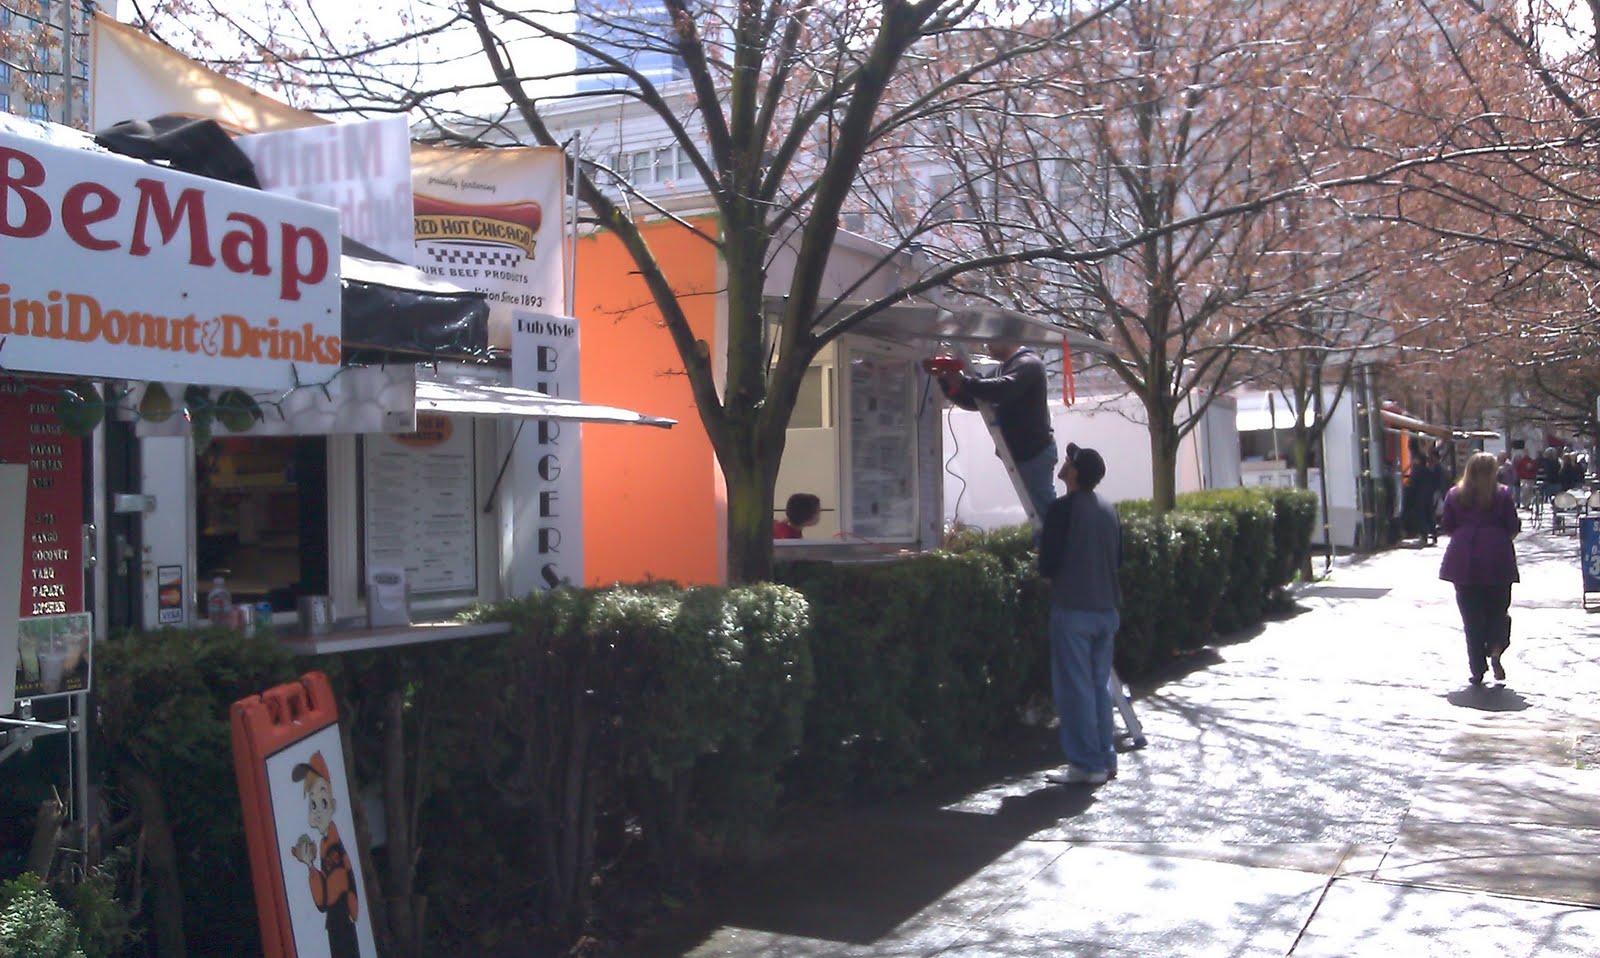
As I have mentioned many times before, I am from New York, and whenever I was in the city, I made it a point to visit street food vendors.  It is in my humble opinion that with exception of late night diners, the best food in NY can be found in cart food.  It is something that I have missed here in Phoenix, so when Allie told me that Portland had lots of cart food vendors, I told her that I would make it a point to eat as much of it as I possible could.  In NY, street vendors have a tendency to spread out, everyone stakes out a territory – the hot dog has this corner while the soft pretzel guy had the next.  In Portland, all of the vendors occupy a shared space, creating a park of cart food.  When I die, I expect that this is what Heaven will look like:
Cart food heaven!!
I had a tasty German bratwurst loaded with all the goodness one would expect to find on such a meal.  It was hard to decide where to go, but in the end, I think I made a good choice.

That evening, my wife and I decided to take in a movie, Portland style.  As per our no chain challenge, we decided that we were not going to sit at a Lowe’s or AMC – nope, it was off to the Laurelhurst Theater in the Northeast section of Portland on the east side of the Willamette River.
The original Laurelhurst marquee all aglow in neon.
This theater was unique in that you could have dinner and a beer with popcorn and other theater treats in the theater while watching the movie!  I have never had this type of movie going experience before, so I was excited.  We got to the showing of “True Grit” early, so we wound up having our dinner in the dining section of the lobby.  But we purchased a big pitcher of a local brew, got our snacks and enjoyed our flick, definitely an enjoyable time.

The last place we stopped on our last day was a Portland must visit: Voodoo Doughnuts.  While the building is not architecturally significant, the doughnuts were pretty freakin’ fantastic, and as with many things in Portland, they were presented with flair:
Voodoo Doughnuts: The magic is in the hole! (Well, not for these guys)
All in all, we had a great time visiting Portland, and I hope we have a chance to do it again soon.  If you have an opportunity to go, do it – you won’t regret it!

PS: Remember these?
Bill and Tedd's time machine?
There are still quite a few left on the streets of Portland.

Keep it weird!

Monday, April 18, 2011

I'm Back!

Hello all!  After being on vacation for the past week and a half, I have returned to work and I will be posting very soon about my latest projects and my fantastic time in Medford and Portland, Oregon.
44 hours and about 1200 miles of driving - a great time indeed!

Back to work!  NOW!

Monday, March 28, 2011

The Storage Turd 5000

My wife and I have proudly held our heads high when it comes to renovating our home.  We have worked hard on making our floors, walls, bathrooms and kitchen as pretty as we can possibly make them.  We were also very happy with the exterior of our house – it needed some work, but it was still nice and certainly passable.  Then God intervened.  In early October of 2010, the Phoenix Valley was slammed with not one, but two wicked hail storms in the same day and my new neighborhood was right in the middle of it.  After the storm, I, like many of my neighbors filed claims with their respective insurance companies, and work began (and is still going on) all around the community.

Hailstones in our front yard.
One of the larger hailstones.
Our damage bill included the roof, A/C unit, large section of fence, the patio cover and our shed.  TECA Roofing (who I highly recommend) did a fantastic job repairing or replacing everything, except our shed.  Apparently, shed replacement was the one thing that TECA did not do.  But, my wife and I gave it a “whatever”, and concentrated on the big stuff that was being repaired; the shed was damaged, but it was still standing.  As the larger items were nearing completion, Allie and I started shed shopping, along with everyone else in the Valley.  Wonderful.  Just about every place in Phoenix was sold out of sheds, and the few that were remaining were very expensive, so we delayed our purchase for a little while longer.  Finally, we found one well within our price range – things were now in motion.

First, we had to get rid of the existing shed. 
The original shed, the Storage Turd 1000.
Allie and I did not want to deal with the demolition of the old shed so we sold it on Craigslist. The person who bought it also removed it and hauled it away. 

Next step – painting the trim and laundry room of the house.  With the money we saved on the new shed (and with what we made on the old shed), we were able to hire house painters for a little bit of a touch up.  The fact is some of the paint was peeling, so with the old shed gone, the time was just right to paint (the original shed was placed up against the laundry room wall, so with the shed gone, that wall could be accessed).  We hired Richard Dumholf and his crew who did a fantastic job for a very reasonable rate.  In the Phoenix Valley, he can be contacted at 602-525-8904.

The front of our house with the original trim color.
A closeup of the original trim (shown with some storm damage).
The house with our new trim color.
Close up of the new trim color and house numbers.
After two days of painting, the job was completed and the new shed was delivered from Home Depot and it was time to build. 

The shed we bought is a pretty basic Arrow storage shed measuring 10’ wide by 8’ deep with a maximum height of 7’ at the ridge line.  It had a smaller footprint then the original, but at least I could stand up in it (the original only had a height of 6' at the ridge line).  The entire box that it came in was about 7’ long by 3’ wide and only 6 inches thick.  EVERY part was going to have to be assembled.  Tons of panels and what looked like thousands of little screws, bolts and washers of varying shapes and sizes lay inside our cardboard Pandora’s Box.  And, just as with the real thing, once it was opened we couldn’t close it back up.  As a matter of fact, Allie had looked up “Arrow Shed Construction” on YouTube and she found a video of a man describing his experience.  Most notable, he mentioned that he couldn’t PAY anyone to help him, and it took 3 weeks for him to build.  Ugh.  Allie and I had to take a step back, reaffirm our love for each other, and get to work.

Of course, about an hour in, we asked: "why did we do this to ourselves" and "why, God, why"?  Well, we were committed, so no point in whining about it, right?

Step one, the floor kit. This actually wasn’t so bad.  After clearing away the old floor (the buyer of the old shed did not want it) and re-grading the ground, we were able to lay down the aluminum floor supports in a fairly short amount of time.  Then, weather delay.  As we were about to start building the walls, the wind kicked up.  The directions for the shed clearly stated not to build in windy conditions. Unfortunately, we had already started putting up the corners for the walls, so we had to disassemble what we had erected above the floor frame (we left the frame in place) and call it a day.  We picked up construction bright and early on the following Saturday morning and continued into the waning daylight of Sunday evening.

Floor kit assembly with corner wall posts and bracing
(this was after the wind delay).

We started with the walls, again, followed by laying down the plywood deck for the floor.

Walls with exposed floor frame.
Walls with plywood deck.
Close up of deck over frame - I used self tapping screws
to bite into the aluminum framing.
After the deck was down, it was time to finish the walls.  By now, Allie and I were pretty tired, and a little overwhelmed by what lay ahead of us – namely the roof.  But, we pressed on….

Completed walls with floor and roof gables.
The roof was probably the most challenging part of the whole thing, as most of the work had to be done on a ladder while holding large panels and tiny screws.  After fighting with the roof for what felt like forever, we were done with the really hard stuff.  Lastly, we had to add trim and the front doors.  A couple of hours later, and the whole shed was finished.
Inside ceiling support.
Ceiling support toward front door.
We survived.  We didn’t kill each other. There was no ritual suicide involved.  We are not divorced.  The shed did not beat us.   However, at the end of the day, it is just a shed.  It is not pretty or fancy, and it is not the first thing we will be showing out guests who visit.  After all of the large renovation projects that we have done, this one, though laborious and large, just seemed sort of “eh” when all was said and done.  Hence the name, Storage Turd 5000.
The completed Storage Turd 5000. It's not so bad!
Should you decide to attempt to build one of these things, here is some advice:
1. Be patient.  Seriously, this is going to take some time  - Rome was not built in a day, and neither is an  Arrow Storage Shed.
2. Have a helper ready to go - you're gonna need them.
3. Be nice to your helper!
4. Keep your instructions near by at all times and re-read them again and again.
5. Keep track of your parts.  We separated out all of our pieces by number.  This will save you a lot of time and aggravation.
6. We found gloves to be very helpful - the panels are thin and sharp - you could really hurt yourself, so be careful.
7. Think outside the box - the directions are a little vague in some places, as are the diagrams.  There also seemed to be some gaps in the instructions.  So, think ahead and take nothing for granted.  This is only a partial paint-by-numbers project - you will need your brain!

Good Luck!